
Bulk Upload Sale Items
Are you an existing store? Don't lose your sale history when moving to Antiquely. Upload your historic sales from a simple Excel file.
| Step 1
EXPORT
First take all your existing data from your current system. Don't worry if you can't get everything right away, you can always redo these steps anytime to add more historic data.


| Step 2
DOWNLOAD
Within Antiquely, go to 'More' > 'Bulk Upload Sale Items' and download the template Excel file. This is required to ensure the data is formatted so we can read it.
| Step 3
MANIPULATE
Add all your historic data to this Excel template. Line up the columns correctly. Guidelines detailing the formatting of data are all included on the 'Bulk Upload Sale Items' screen. For example make sure you've setup all your dealers in the app before uploading historic sale items.


| Step 4
UPLOAD
Once you're ready, click the 'Upload Template' button and select your Excel file. We recommend doing batches of max 500-1000 items per Excel file.
| Step 5
REVIEW
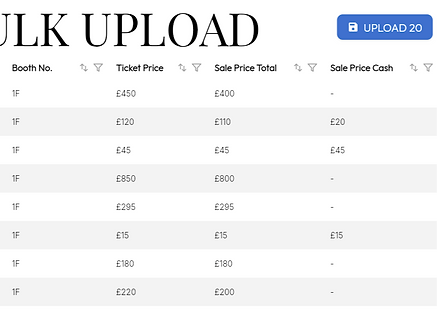
The app will read the Excel file and show you all the sale items it's read. Check through the table to ensure you're happy the data is correct, e.g sale dates haven't been missed or dealers aren't being assigned correctly. Nothing is yet saved so you can always cancel now, make edits to the Excel and re-upload.

| Step 6
SAVE
When you're absolutely happy, click 'Upload All'. This will add all these records to your account. This may take some time so just let it load. Once finished you can view the data in your sales or analytics tabs.
Behind the scenes, we create a new receipt for each sale item uploaded so it's associated with a receipt in the same way that any other sale item sold through the app would be.